
While waiting for the parts to get shipped to me, I played with the BIOS flash, trying to get coreboot on it as I did with the X230.
Acquiring BIOS blobs
Like the X230, this one comes with two flash chips. The difference is that instead of positioned top & bottom, this one is left & right.
The first thing I did was ensuring I could get the BIOS flash chips content.
Reading the chip
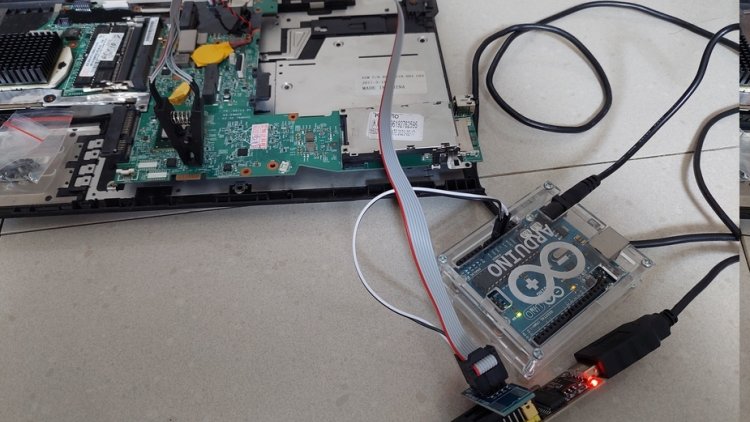
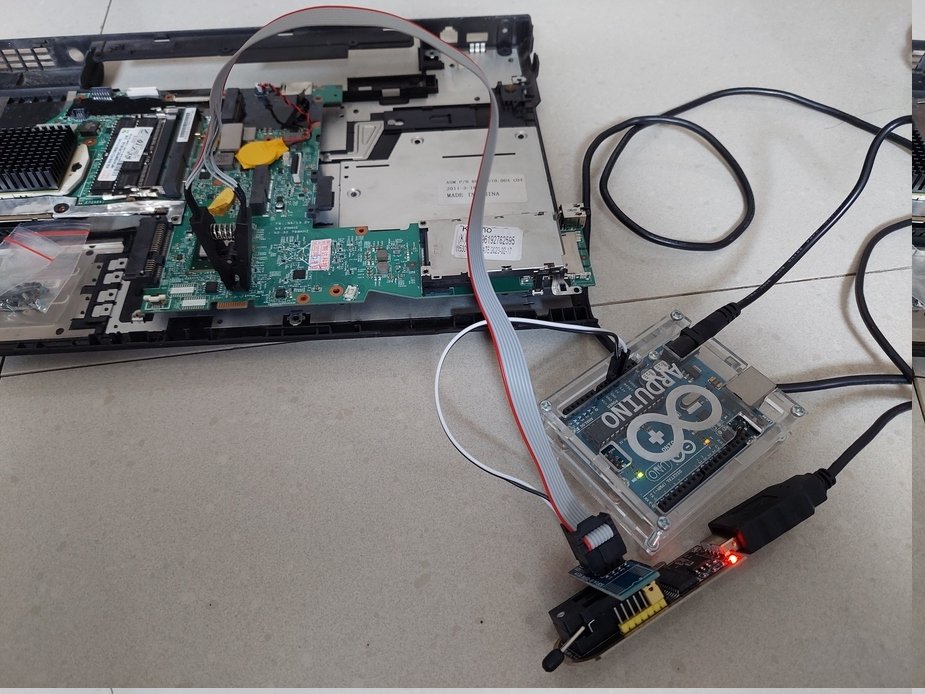
I hooked up my trusty CH341A. After numerous failed attempts due to inconsistent readings, I discovered that the procedure requires external power.
I use an Arduino Uno, with its 3v3 pin. The 9v power supply is required as the USB power source doesn't seem to provide enough amp.
I started with the left flash chip. This yields 8 MiB image.
for i in {0..3}
do
    sudo flashrom \
        -p ch341a_spi \
        -c MX25L6406E/MX25L6408E \
        -r /tmp/dump${i}.rom
done
Without external power:
$ md5sum /tmp/dump*
02fccb5c4780636f44de04aad28f1df3  /tmp/dump0.rom
637f458b6bfbe5bed17699c6409bac1a  /tmp/dump1.rom
786229f431d79f315da0a9e09897ed6e  /tmp/dump2.rom
d3619d2365facb6712d6ba2a6f7b495b  /tmp/dump3.rom
With external power:
$ md5sum /tmp/dump*
1427eb86b50862a9f7c0e8bb289a8a49  /tmp/dump0.rom
1427eb86b50862a9f7c0e8bb289a8a49  /tmp/dump1.rom
1427eb86b50862a9f7c0e8bb289a8a49  /tmp/dump2.rom
1427eb86b50862a9f7c0e8bb289a8a49  /tmp/dump3.rom
As we can see here, quite some difference.
For right chip, MX25L3205D/MX25L3208D is used for -c option, yielding 4 MiB image
Combining the images
The 8 MiB (left) ROM goes first. With that said, I combined them into a single image with:
$ cat dump8.rom dump4.rom > bios-original.romExtracting the firmware blob
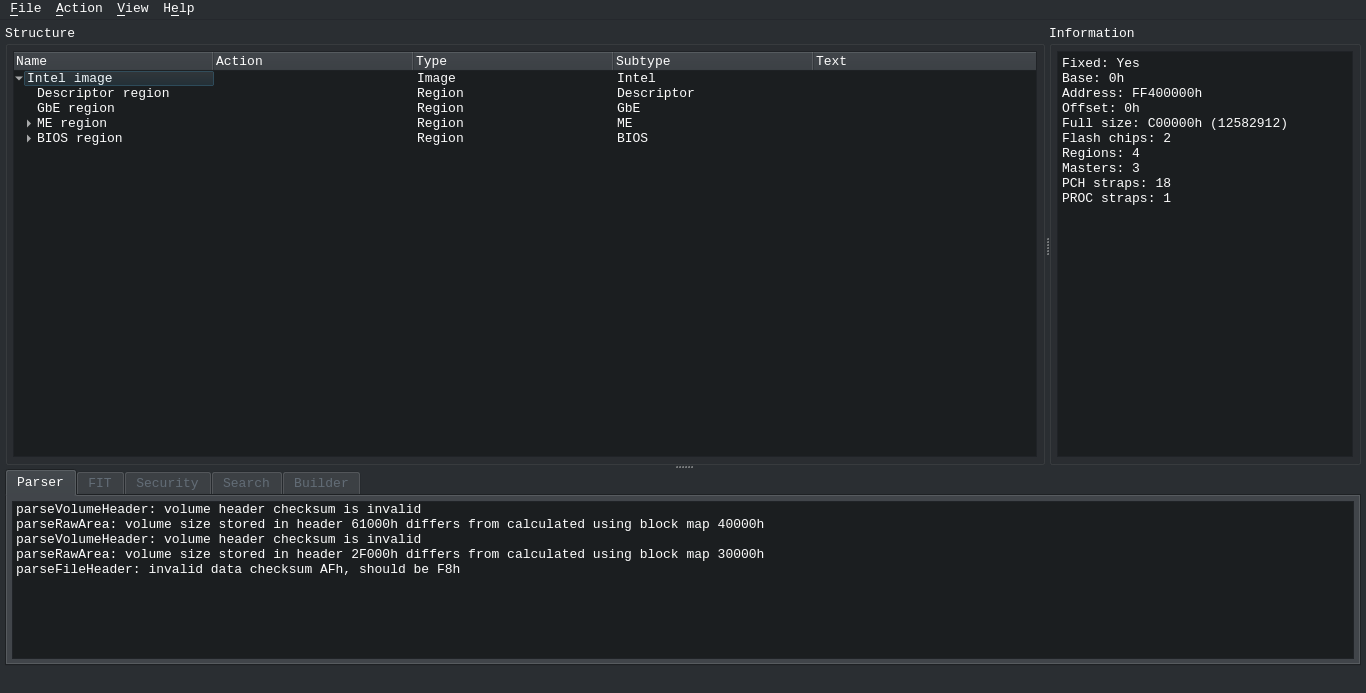
I opened the bios-original.rom with UEFITool.
Then ran a search for "PCIR" text, making sure "Unicode" is unchecked.
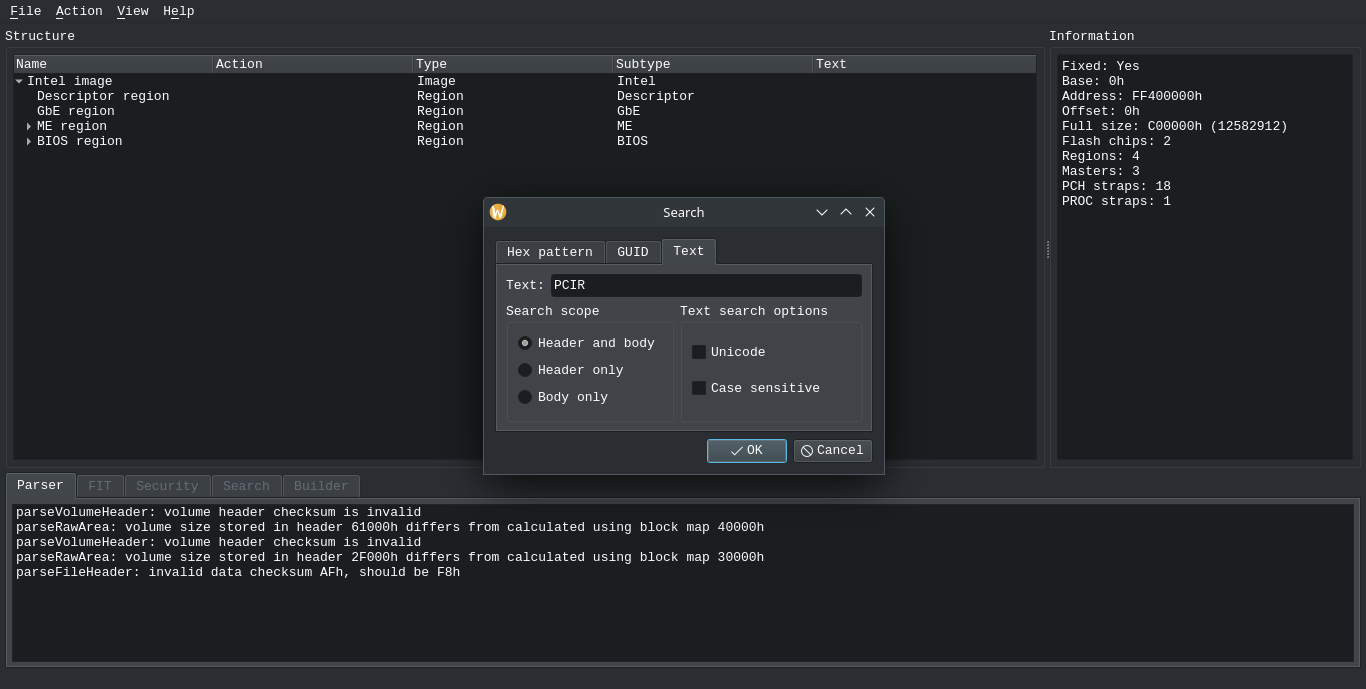
This yields a few results.
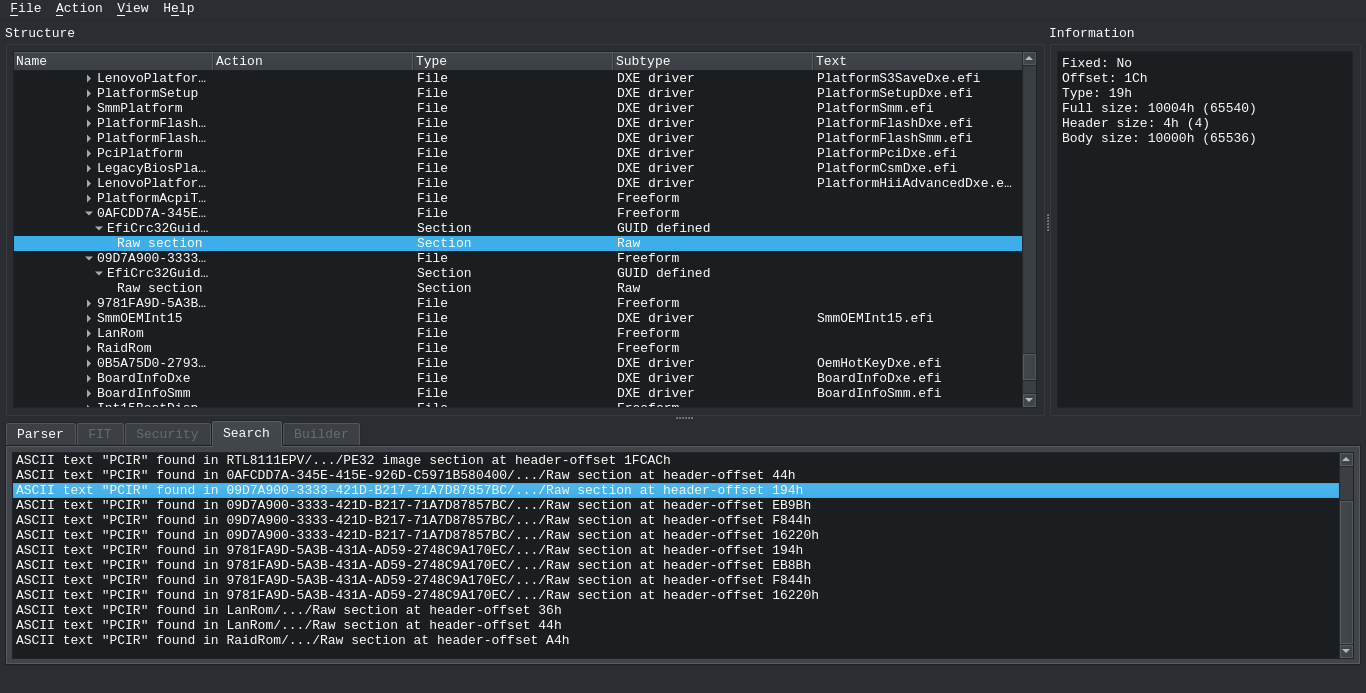
My hunch told me the UUID ones are the video BIOS images. There were three different UUIDs, So I extracted each of them into binary files.
Thanks to this repo, I was able to not only know that I was right, but also to tell which image is which GPU. The repo provided the video BIOS images that were already extracted, and I was able to match the hash sums.
- 0AFCDD7A-345E-415E-926D-C5971B580400 -- Intel
- 09D7A900-3333-421D-B217-71A7D87857BC -- NVidia K1000
- 9781FA9D-5A3B-431A-AD59-2748C9A170EC -- NVidia K2000
Without much ado, I included the images for Intel Integrated GPU, as well as the NVidia K2000 discreet GPU.
Building the coreboot image
I basically copied all that I did for the X230, except for the board model and the included VGA BIOS, for which I added the discrete VGA BIOS.
Flashing
I split the image.
$ dd if=coreboot.rom of=left.rom bs=1 count=8M
$ dd if=coreboot.rom of=right.rom bs=1 skip=8M
Then flashed each chip.
$ sudo flashrom -p ch341a_spi -c MX25L6406E/MX25L6408E -w left.rom
$ sudo flashrom -p ch341a_spi -c MX25L3205D/MX25L3208D -w right.rom
When I turned it off and turned it back on, it showed the familiar SeaBIOS boot screen.
Both Linux and Windows work. I got a Gentoo and a Debian systems on my mSATA, both with Plasma desktop environment.
Debugging
Even though getting it up and running was easy, getting it up and running as well as I hoped for wasn't as simple.
Smaller Issue
There were a few simple issues that was caused by missed coreboot config. One of them was the Could not find coreboot options table error. I simply fixed this by setting the "Option backend to use" on "General setup".
There was also an issue of the machine mysteriously turning off during the Gentoo package compilation, especially for the heavier ones. That one was due to the lack of thermal control and was promptly fixed by installing thermald and decreasing the number of parallel processes from 8 to 6.
Bigger Issue
There was also an issue that ran quite deep where the discrete GPU doesn't work. I tried it with Linux and Windows, both could only get the Intel GPU working, and not the nVidia.
When I tried enabling only the discrete GPU, the laptop wouldn't turn on at all, forcing me to reset the BIOS config by unplugging the CMOS battery.
I thought to debug with the EHCI debugger. For this, I built coreboot with EHCI debugging option and flashed the recompiled image.
I tried going through with the FT232 option, but it would require a very specific type of FT232 chip, which is not what I have. Thankfully, BeagleBone Black is also an option; with this, I get to use my FT232 as the reader. However, I somehow couldn't get it to show any output.
The next thing I tried was plugging in the POST debugging card. However, it shows only zero and nothing else, even with the laptop booting successfully.
So then in my desperate state, I looked thru the running system log, hoping to find a slightest clue. I booted to my trusty Debian system, and tried to load the nouveau module, which didn't work, expectedly. When I looked through the log, I saw this:
Invalid PCI ROM header signature: expecting 0xaa55, got 0xffffI then looked on what PCI ROM header is, and what it's supposed to be. I even read through the Linux kernel source code itself. I started by simply searching the error message that I got above, which landed me on the PCI device driver. Then I learned that all the PCI devices would start with the same bytes sequence of 0xaa55. I then looked through the VBIOS for Intel & nVidia which I include in the build, and they both start with the same bytes.
As I was looking through the list of devices with lspci -nn, I noticed the PCI ID for the nVidia GPU was slightly different from the one I entered on the coreboot config. I then rebooted the machine and entered the coreinfo to see the PCI list, showing the same PCI ID of 10de,0ffb.
Then it occured to me that I may have entered the wrong PCI ID of 10de,0ffc, which is for the K1000M.
After having the correct PCI device ID, I am able to load the device driver with no issue. Even got my external monitor working now!
